How to Make a Box Pleat Bed Skirt
Adding a box pleat bed skirt to any bed creates a unique, tailored look that usually costs a small fortune to have made. This tutorial will teach you how to make a box pleat bed skirt the easy way, so you can affordably add a layer of sophistication to your bedroom.

After I built and upholstered Hannah's wing-back headboard, I knew I wanted to pair it with a box pleat bed skirt. It's a look I've always loved for it's sophistication and uniqueness. So, I set out to make one with fabric I already had.
I used the same fabric to upholster her over-sized bulletin board, and I think it was the perfect choice. It finishes off her velvet headboard nicely, and will always look tailored because of the flat pleats.
To see how the bed skirt looks with trim and to get a look at the updated version of Hannah's room, visit this post: Hannah's Jane Austen-inspired bedroom.
Box Pleat Bed Skirt
I believe in doing things right, but I also believe in doing them as minimally as possible. If you were to have this made by a work room or seamstress, they would use a clear ruler made for sewing, fabric chalk, and all kinds of sewing gadgets. I literally used a tape measure and sewing machine.
As such, my materials list is very small for this project, but feel free to buy all the sewing-related things if you feel that will help your bed skirt turn out well. Also, while this is not a hard project, it isn't one I would recommend for beginners, unless you're willing to take your time, learn as you go, and give yourself a lot of grace.
Preparation
1 | Measure: The first step is to measure the drop of your skirt. What that means is, you'll need to measure from the top of the box spring to the floor, then add 4"-6" for hems. My finished skirt has a 16" drop.
2 | Cut: Next, you'll need to cut your fabric. I used six different pieces of fabric that were 120" long x 20" tall and then I sewed them all together at the end because it's hard to work with a length of fabric that goes all the way around a bed. I chose to chop mine up since the seams would be completely hidden within the pleats.
3 | Mark Pleats: The easiest way for me to calculate all those box pleats was to simply mark every 5". I suggest marking all your lengths/pieces of fabric before doing anything else.

[show_shopthepost_widget id="5033326"]
4 | Hem Skirt: You do not want to hem this bed skirt after creating large, flat, pressed pleats, so go ahead and hem the bottom of all your bed skirt pieces at this point. And to save you more time at the end, iron that hem down now.

Making Box Pleats
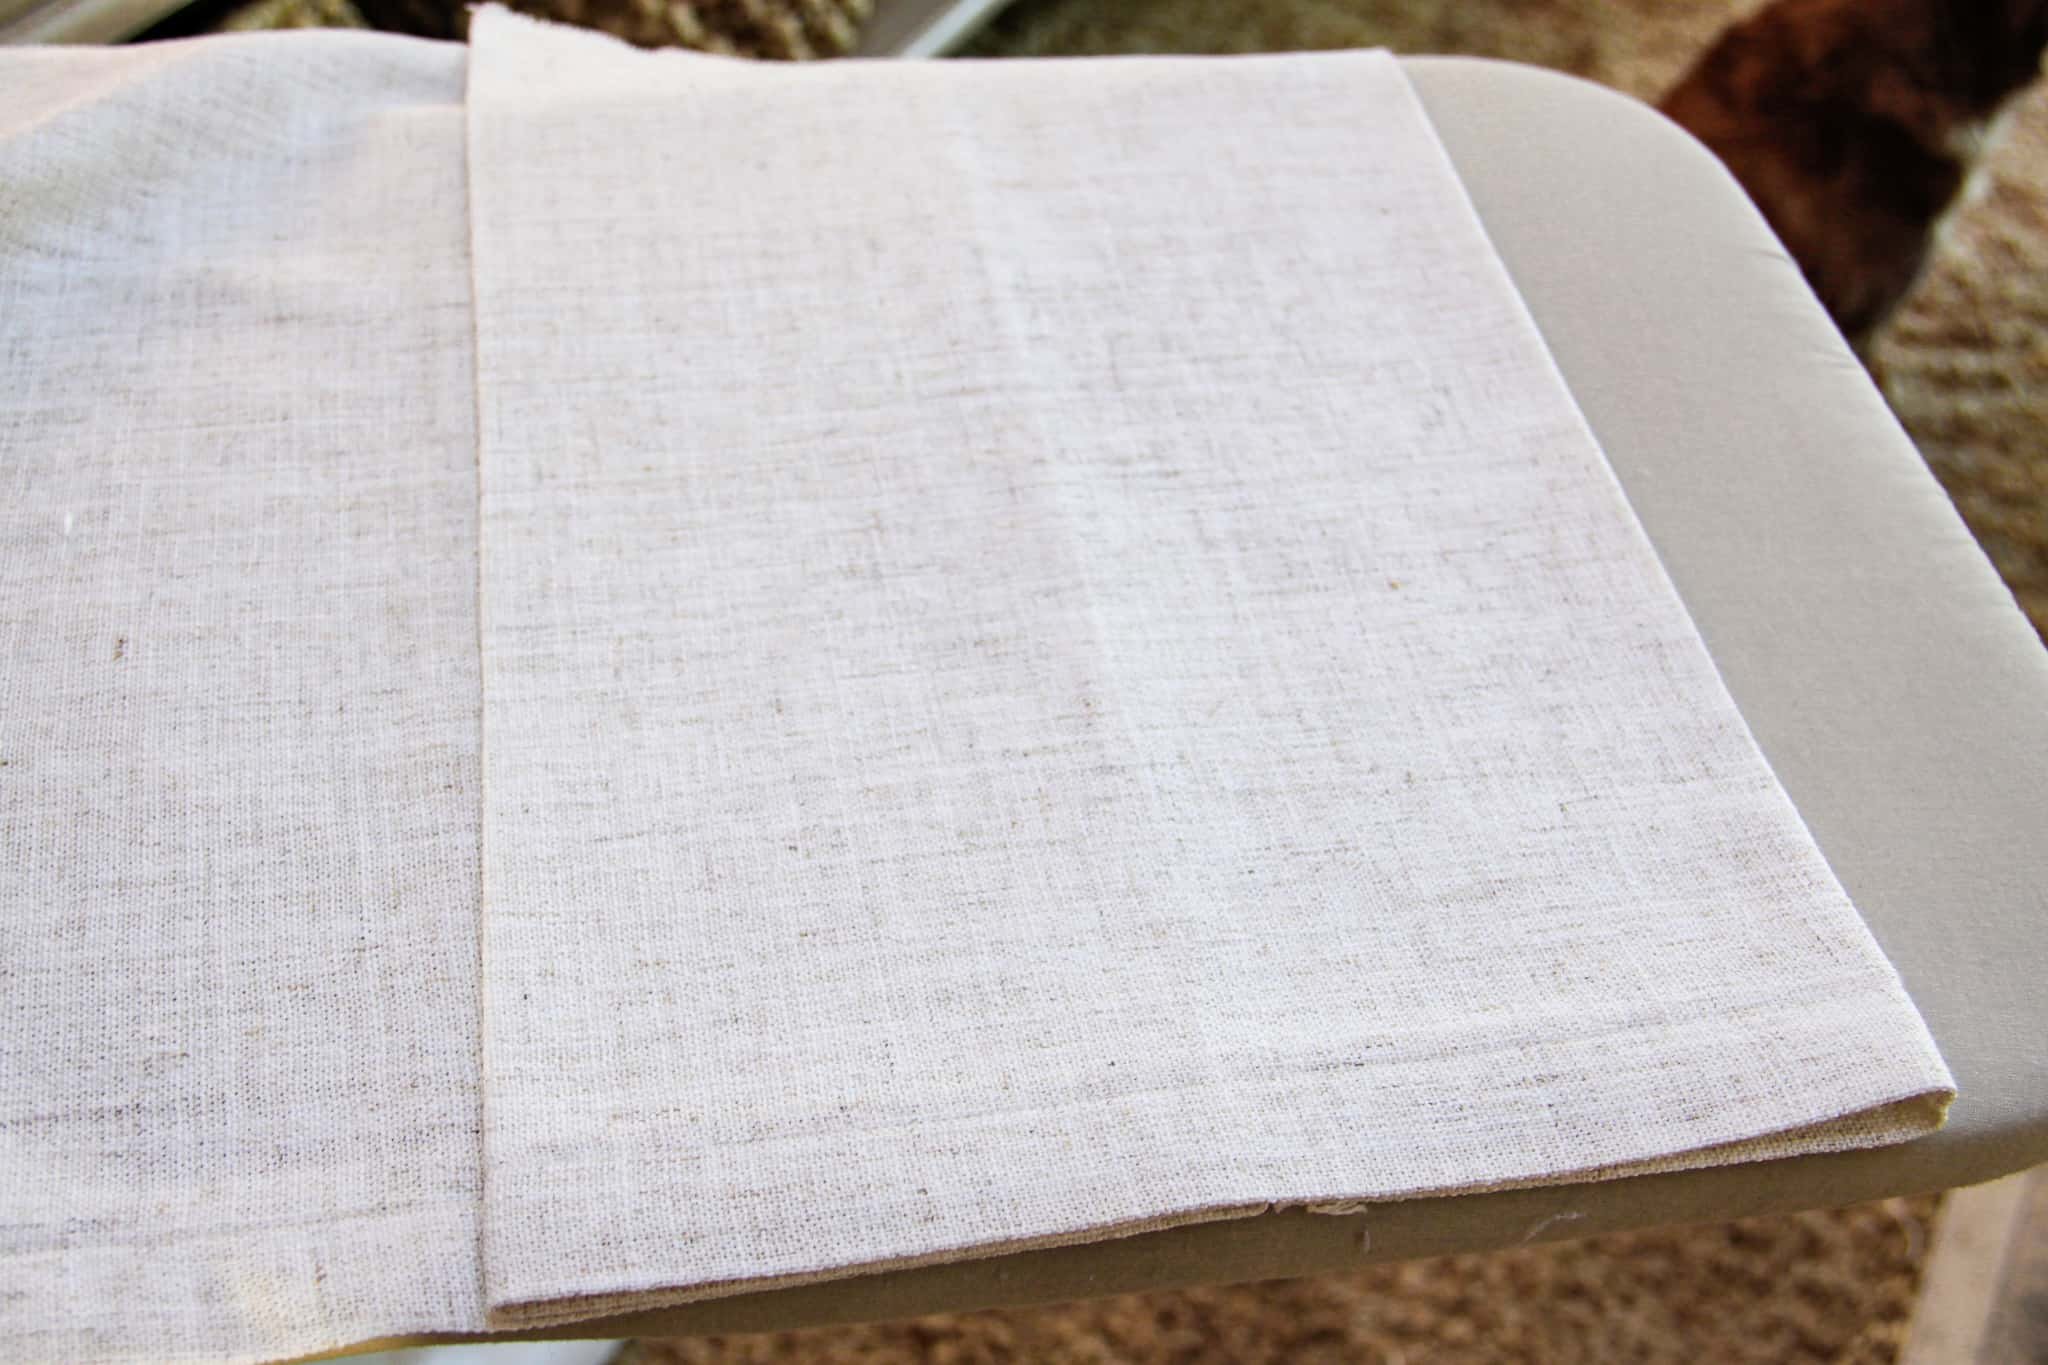
5 | Create Pleats: To create your pleats, simply pinch the fabric at the top and the bottom where you marked every 5", and either fold over or under, depending on what part of the pleat you are making. Basically, you want the top of the pleat to be 10", with the underside of each pleat to be two 5" sections that meet in the middle.
Refer to the photo of the finished pleat to fully understand how it's supposed to look.

I was taking pictures one-handed while making this bed skirt and didn't get any of me making the folds. I hope this picture helps you see the structure of each pleat. The flat top portion is 10" and the two sections underneath are 5" each and they meet in the middle, creating a box pleat.
6 | Iron Pleats: After you make each fold, iron it really well to create crisp, flat pleats as you work your way down the length of fabric.

6 | Pin Pleats: After everything is ironed, use pins to hold your pleats in place. You're going to be sewing the top edge of the bed skirt next and you don't want your pleats falling out as you're sewing.

Finishing the Bed Skirt
7 | Sew Along Top Edge of Bed Skirt: In order to keep the pleats permanently in place, you'll need to sew a straight line along the top edge of the bed skirt. Once this is done for all sections, remove your pins.
At this point, I had six box pleat sections that needed to be joined together.
8 | Sew Sections Together: I wish I had an easy way to explain how I did this, but I sort of made it up as I went, depending on where the pleats were joining.
For instance, if the end of one section folded over to join another section and the seam would fall in the middle of the front of a pleat, I would simply cut off some fabric so that the seam would meet up underneath the pleat and be hidden.
Attaching the Bed Skirt
9 | Attach Skirt to Box Spring: You can choose to sew Velcro onto the upper edge of the bed skirt and glue some to your box spring. I've done that before, but I've found that the easiest way to attach this type of bed skirt is to hot glue it to the box spring.
Sounds crazy, I know, but it keeps it in place, and if you ever need to remove the skirt, the glue peels right off the box spring.
And just look at how cute this style of bed skirt is!

I'd love to see your bed skirt if you do this DIY. I think it just takes a bed to the next level and always looks tailored. Plus, it hides unsightly bed frames beautifully.
[show_shopthepost_widget id="5033326"]
Hannah's Bedroom Posts
The countdown is on to Hannah's room reveal! It's so close and I'm excited to share it with you. If you've missed any part of this room renovation, get caught up here:
- Hannah's Teen Bedroom Design Plan
- Vertical Shiplap, Skim Coated Ceiling, and Contrasting Crown Molding
- DIY Upholstered Bulletin Board
- Dark Green Dresser and Mirror Makeover (you get a peek at how her room has been for a year and a half in this post)
[mv_create key="2" thumbnail="https://wildflowerhomeinteriors.com/wp-content/uploads/2020/05/how-to-make-a-box-pleat-bed-skirt.jpg" title="How to Make a Box Pleat Bed Skirt" type="diy"]Okay, until the next post or project,

You might also be interested in:
